
Greetings, design enthusiasts! Today, we have an exciting tutorial that will take your Microsoft Word skills to new heights. Whether you’re crafting a heartfelt memorial program or working on any design project, mastering the art of inserting images into shapes can make your documents truly stand out. Why Learn This Skill? Designing with precision and creativity in Microsoft Word opens up a world of possibilities. In our latest tutorial video, we’ll guide you through the step-by-step process of inserting images into shapes using the Blue Sky Funeral Program Template. This technique isn’t just limited to memorial programs; it’s a versatile skill applicable to a range of design projects. Godserv Designs Tutorial: How to Fill A Shape With An Image in Microsoft Word 📌 Tutorial Highlights: Inserting Images Into a Shape Video Tutorial Quick Steps for Efficient Learning about Inserting Images with the Shape Fill Method: Why Watch This Tutorial? 🔗… read more
tutorial

This tutorial focuses on How to Replace Images in Microsoft Word Template using the Change Image from File Method. If you purchased one of my Word and Publisher Templates from Godserv.com, Etsy, Creative Market, or Design Bundles, then this tutorial is for you. The image place holders in my Word templates like Funeral Programs, Prayer Cards, Flyers, etc will need this method to successfully insert photos and image backgrounds unless otherwise indicated. Final Results Resources used in Replace Images in Microsoft Word Template Tutorial

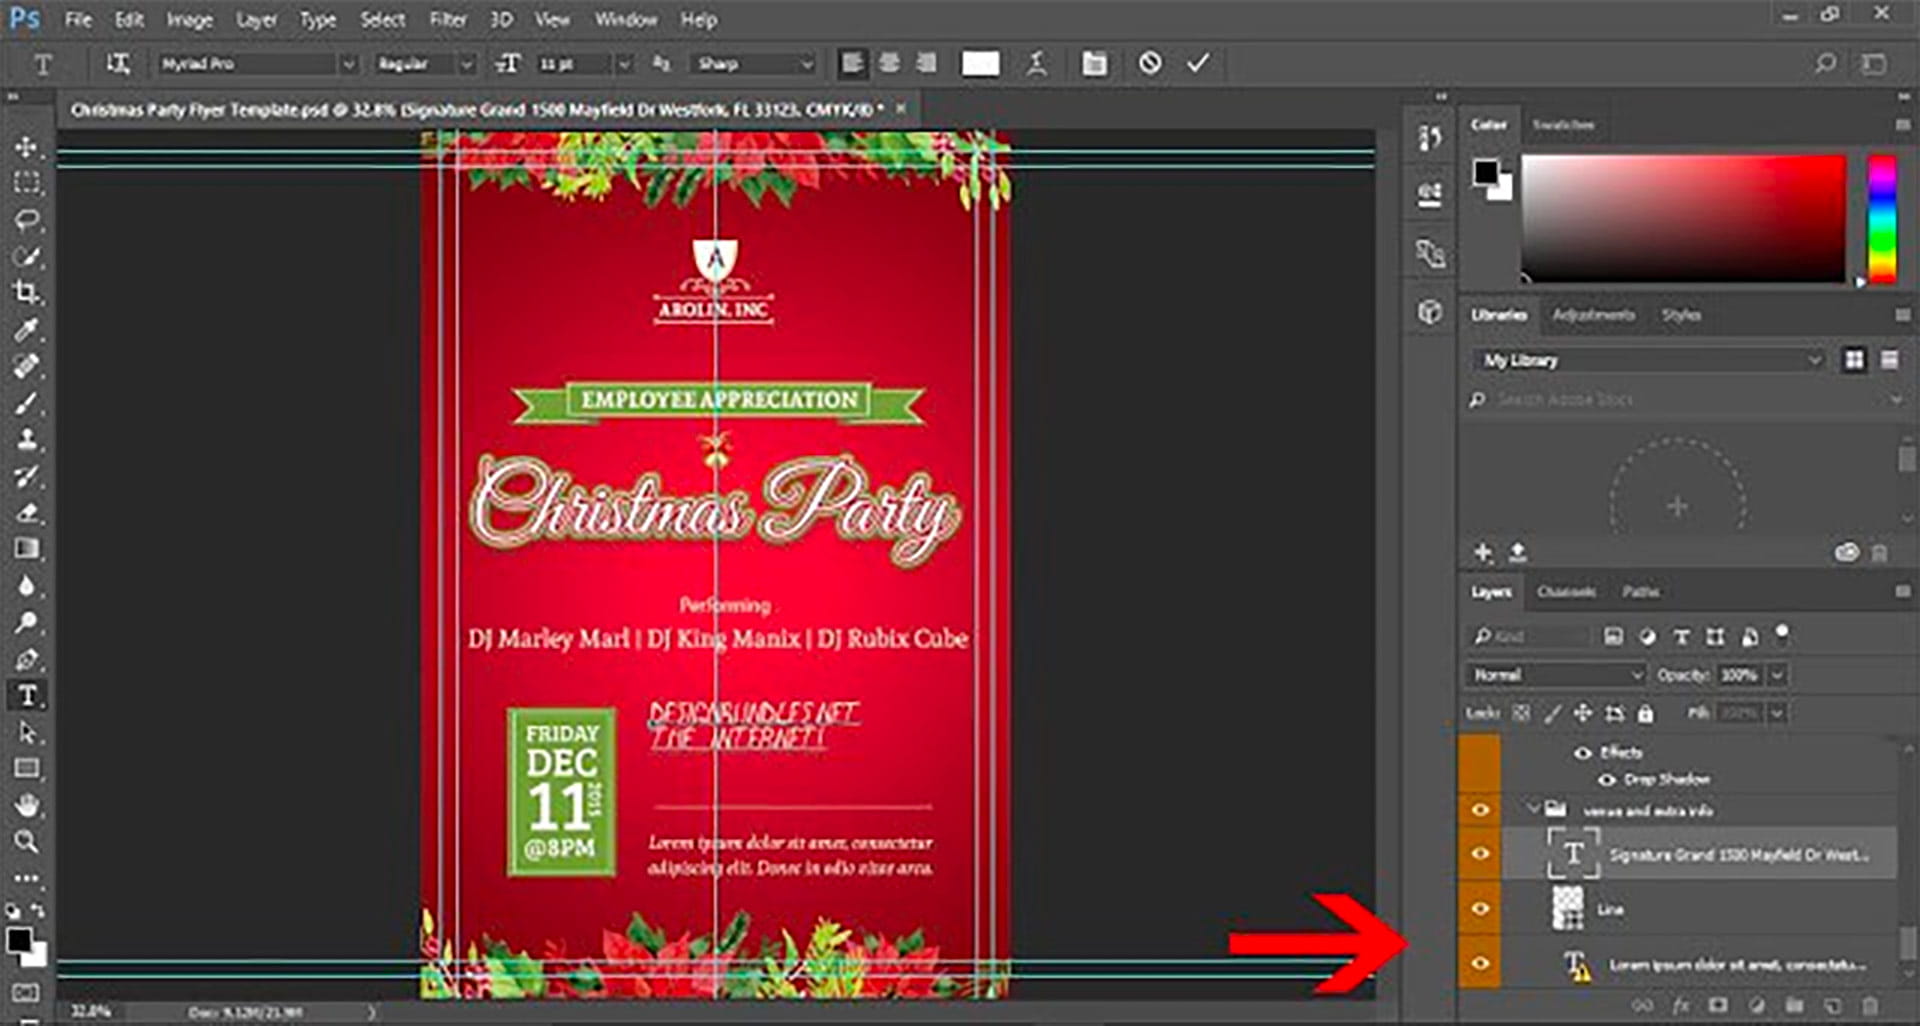
This is a quick review to edit Microsoft Word Funeral Program Templates. Inserting Photos, Editing Text and Colors are the main focus of the tutorial. If you learn these tips, 90 percent of your work for editing my Funeral Program Templates done in Word can be accomplished. At the end of this video tutorial, you will learn how to Replace the Photo Placeholders in my Word Templates, Copy and Paste text from another Word file into the template in a way that maintains the formatting that is set in the template and you will also learn how to edit colors on a shape. You will learn how to edit a gradient color or add a solid color to a shape. Final Results Resources Used in Edit Microsoft Word Template
Here is a brief overview tutorial on how to Edit templates in Photoshop. You will need Adobe Photoshop to Edit Adobe Photoshop Templates. If you do not own Adobe Photoshop, you can download a trial version or purchase it here:http://tinyurl.com/n4stbhf Files Used: How to Edit Templates in Photoshop Ensure that your file has been downloaded and unzipped to use. 1- Open Ps. Click on file > Open. 2- A new box will appear. Select the Photoshop template you would like to use and then select open. 3-You may get a new box appear stating that the file is using fonts that are not on your PC. At this point, if the required fonts came with the template close Photoshop and install the font, then re open Photoshop and the template. If the template did not come with the fonts needed follow the prompts on the pop up box, 4- After… read more
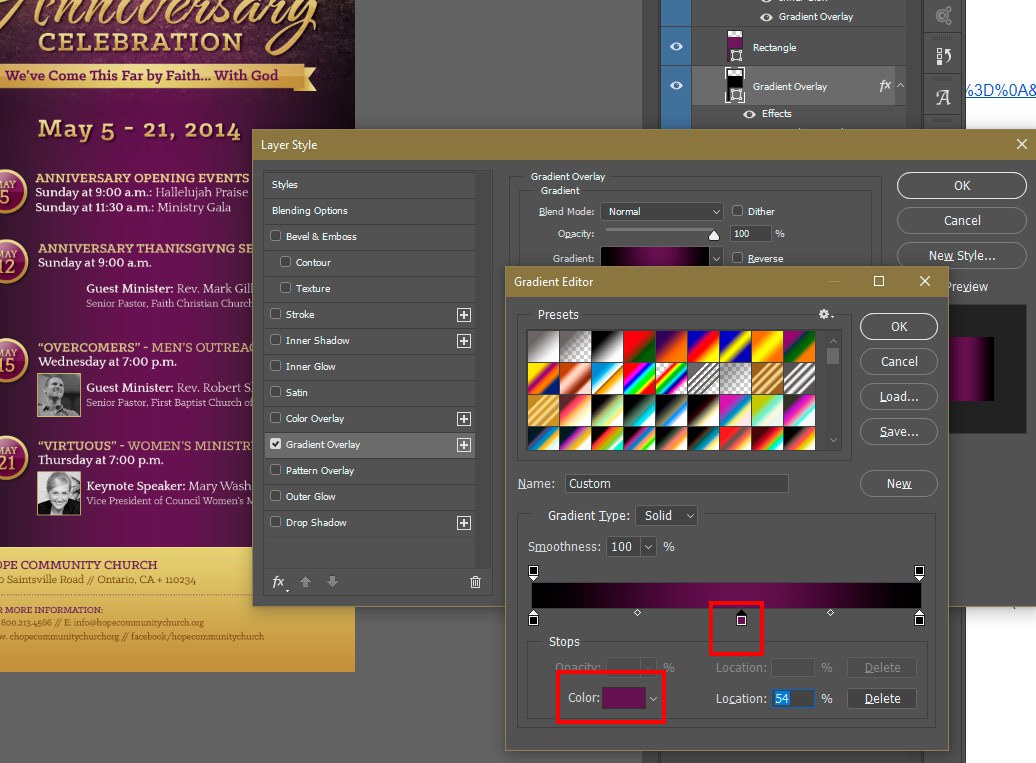
Knowing how to Edit a Photoshop Template Gradient Layer Style is important, because many Photoshop Templates uses gradient layer effects for lighting, shading, background color and more. A gradient is basically a transition of one color to another. In this Photoshop tutorial, you will learn how to edit a Gradient Layer Style (Effect) that is in a Photoshop Template. Template Used Church Anniversary Events Rack Card Template Application Requirement Photoshop CS3 or higher How to Edit Photoshop Template Gradient Layer Style Open your layer palette and find the layer that has a gradient layer style applied to it. In this case the layer is named ‘Gradient Overlay” – this layer has a gradient overlay effect on it that you will need to edit in order to change the gradient color. This template has a black to purple gradient. We will be changing the Purple to Blue. Click the small arrow… read more
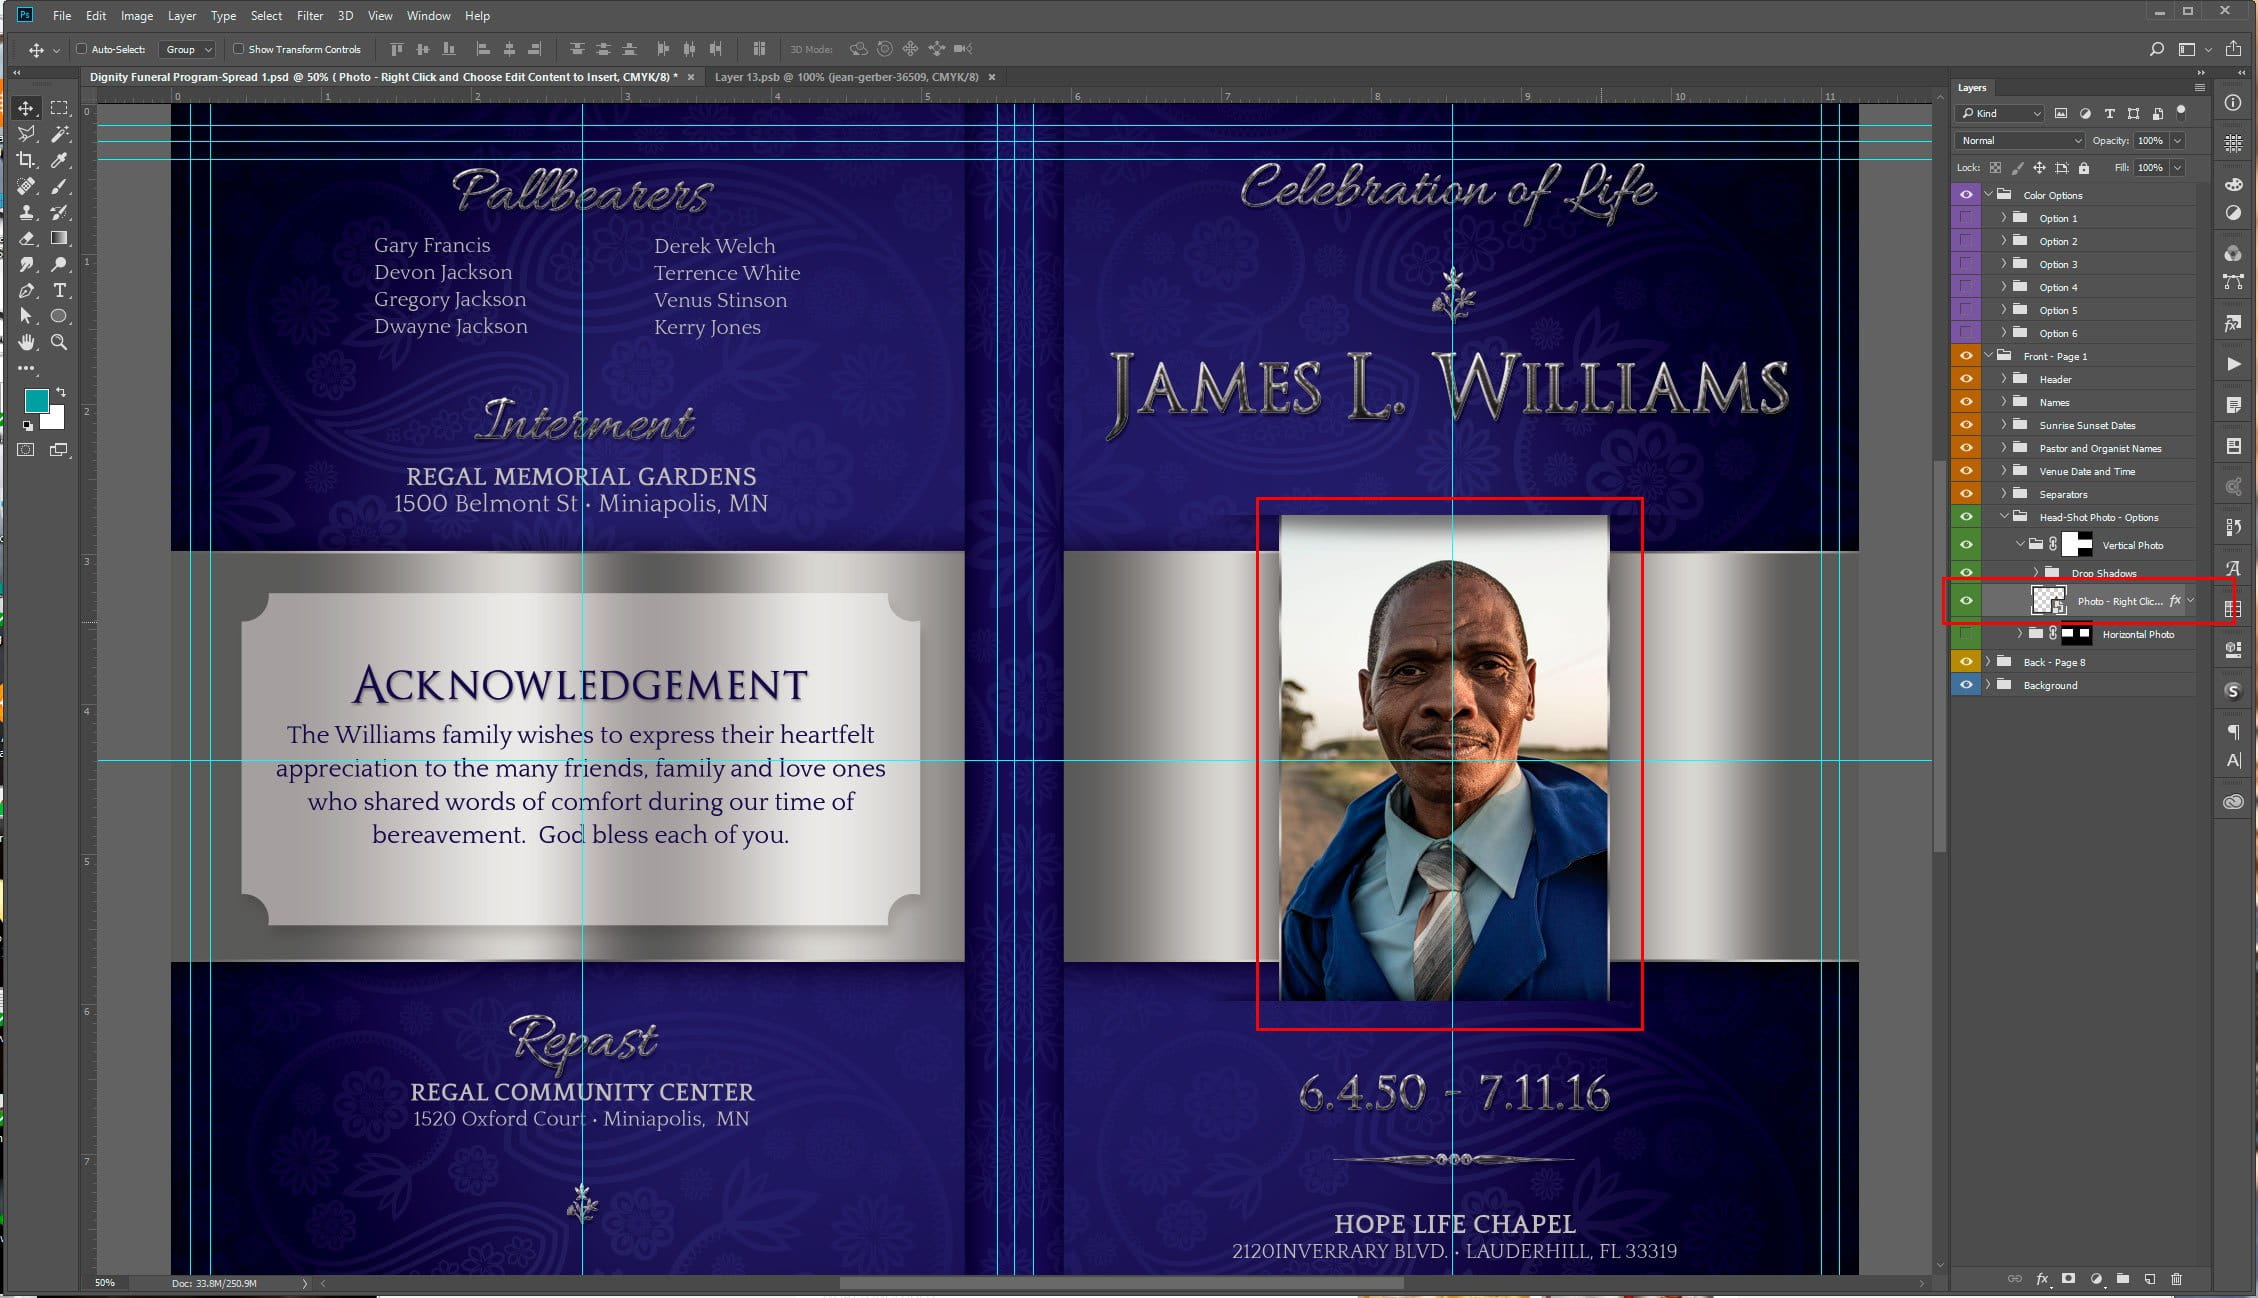
Smart Object are sometimes used for image place holders within a Photoshop template. Smart Objects are layers that contain image data from raster or vector images, such as Photoshop or Illustrator files. Smart Objects preserve an image’s source content with all its original characteristics, enabling you to perform nondestructive editing to the layer. That’s a mouth full for those not familiar with Photoshop, but simply put, a Smart Objects holds a Photo or Vector Image in a container, allowing you to make nondestructive edit. The Smart Object technique for Photo place holders within a template is very ideal. This tutorial will show you how to insert a Photo into a Smart Object that is contained in a template. In this case, it will be a Funeral Program Template by Godserv Designs. Template Used Dignity Funeral Program Photoshop Template Photo Used for Smart Object Courtesy of Gene Gerber, Unsplash.com Application Requirement Photoshop CS3 or… read more


